3D printing · Guide · UK 2026
Chairside 3D printing of permanent crowns and bridges: what it is and where it fits
Same-day crowns have been possible for years with chairside milling. What's changing is that 3D printing is becoming a realistic chairside option for permanent restorations, not just models, guides and temporaries. In my 25 years in dentistry, few changes have generated as many questions from dentists. This post explains how the workflow works, what to ask before you invest, and where it fits in a general practice.
What is chairside 3D printing?
Chairside printing means scanning, designing, printing and finishing a restoration in the surgery while the patient waits, rather than sending an impression or scan to a lab. The aim is to fit a definitive restoration in one visit, with no temporary and no second appointment for suitable cases.
The workflow, step by step
- Scan. Capture the prep, the opposing arch and the bite with an intraoral scanner. A clean margin is as important as ever.
- Design. Design software, increasingly AI-assisted, proposes the restoration. You check the margin, contacts, occlusion and thickness, and adjust where needed. The clinician stays responsible for the design.
- Print. The design is sent to the printer with a resin intended for permanent restorations.
- Post-process. Depending on the system, that means cleaning, curing to the manufacturer's protocol, then finishing and polishing before cementation or bonding.
Follow the manufacturer's instructions for every step. Printed resins only reach their stated properties when they are processed exactly as specified.
An example: Eighteeth SideLab P1
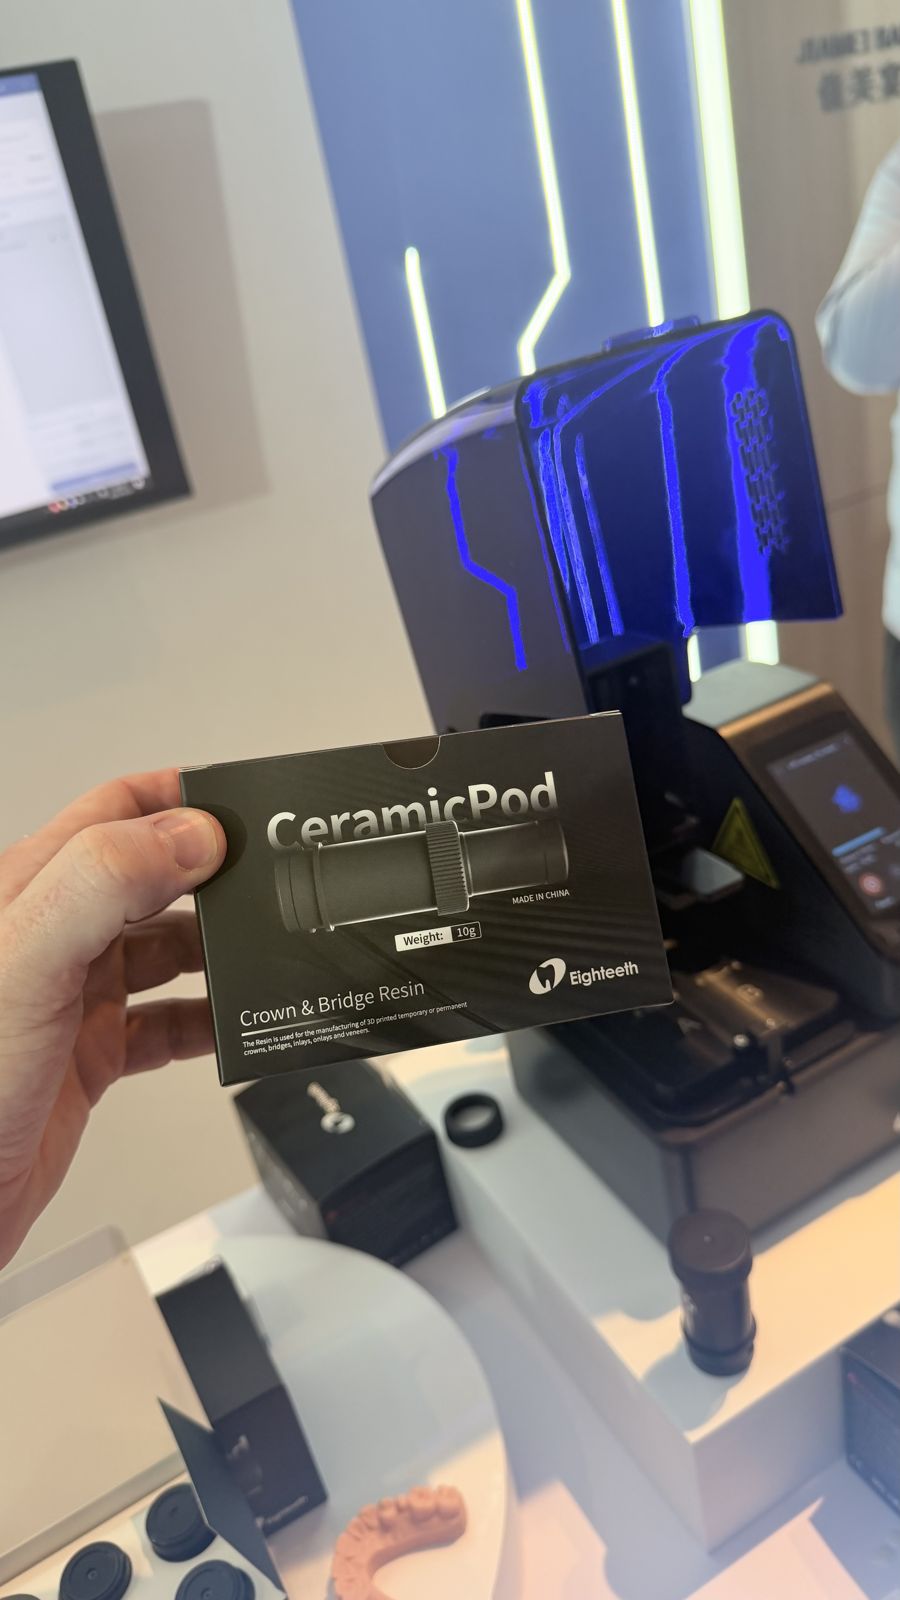
One system 360 Visualise supplies is the Eighteeth SideLab P1 chairside printer. According to 360V and Eighteeth's published information:
- It works with Eighteeth Helios scanners (500, 680 and 700) and AI Crown design software, and exports open STL, PLY and OBJ files so you can still send cases to your lab.
- Resin comes in sealed capsules, with no tank to pour or clean, and curing is built into the printer.
- It's designed for permanent anterior and posterior crowns, with bridges listed as coming next and models and guides available through an optional open-resin module.
- Print and chairside times are Eighteeth figures for trained users and vary with the case and operator.
- At the time of writing, the 360V page states the crown resin is in the final stage of certification, with documents available on request once issued.
That last point applies to any system: check the certification status of the resin for permanent use before you treat patients.
Questions to ask about materials and certification
- Is the resin certified as a medical device for permanent restorations (not just temporary), and for which indications: single crowns, bridges, inlays/onlays?
- Can I see the instructions for use and certification documents?
- What are the minimum thickness and connector sizes, and what bonding or cementation protocol is recommended?
- What published data is there on strength, wear and long-term performance?
- Is the printer validated with that resin, and is it an open or closed system?
- What's the shelf life of the resin, and how should it be stored?
Where it fits a general practice
- Single-unit crowns in suitable cases are the obvious starting point.
- Patients who value one visit: busy professionals, patients who travel, anxious patients.
- Freeing appointments: no fit appointment and no temporary to remake.
- Working alongside your lab: complex aesthetics, larger bridges and cases outside the material's indications still go to the lab.
It isn't for every case or every practice. Be realistic about the learning curve, chair time while you're learning, and the cases you'll select.
Getting started
If you already use an intraoral scanner, check whether it's compatible with the printing system you're considering. My guide to choosing an intraoral scanner covers what to look for. Then see the full workflow demonstrated and ask for a printed sample before you decide.
[Placeholder: Pete to add his own observations once he has seen cases from UK users]
FAQ
Can you 3D print permanent crowns chairside?
Yes, with a printer and a resin certified for permanent restorations, processed to the manufacturer's protocol. Always check the resin's certification and indications.
What is the chairside printing workflow?
Scan, design (often AI-assisted, checked by the clinician), print, then post-process: clean, cure, finish and polish before fitting.
Can I still use my lab?
Yes. Open-file systems let you export cases to your lab for anything outside the chairside material's indications.
Does the SideLab P1 work with any scanner?
According to 360V, it works with Eighteeth Helios scanners (500, 680 and 700).